Beachy Candle Projects

Candlewic Sand Candles
Materials
- Sand
- Tub / Bucket
- Water
- Glass or solid object
- Wax (141 Melt point)
- Wick
- Dyes or (Color Blocks)
Instructions
- Fill the tub/bucket up with sand.
- Add water and try to pack the sand as tight as possible. The tighter it packs and the less water you use, the more consistent the outside shell of the candle will be.
- Take the cup or object and form a “cavity” in the sand. Once the cavity is formed, take your wax and pour at around 195-205°F.
- Once the wax gets a film on top, place the wick assembly into the wax. As the wax gets a little harder you may want to add shells and other non-combustible decorations!
Sea Glass Votives
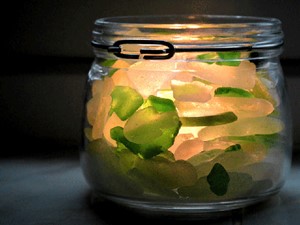 As you walk along the foamy coast, collect the smoothed over pieces of colorful sea glass. For a quick and easy candle project you can make a centerpiece that glows all those pretty blue-green colors.
Just grab a glass votive holder, a homemade votive or one from Candlewic, and a larger container or mason jar to set the votive holder in. Place the votive in the votive holder and lower into the larger container. Fill the space between the votive and container with your colorful sea glass. For the best glow, fill it to the top of the container.
***Photo and idea from Lovely Greens blog.
Sea Shell Votives
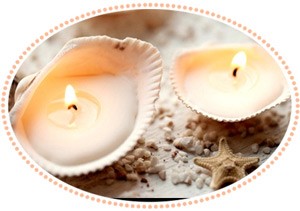 Many people like to collect sea shells from their beach vacations. Instead of letting them sit around or get misplaced, put them to use as candles! This project works best with larger sea shells. All you need is a wick assembly, your melted wax and the shell.
Simply place your wick assembly at the center of the shell and pour your wax into the seashell, making sure your wick stands straight. When the wax hardens you can place several of these candles on a decorative, fire-safe platter decorated with sand, pebbles, sea glass or other things you’ve collected on vacation!
***Photo courtesy of Where OR What Blog.
Did you try one of our summer beach candle projects with Candlewic products? Send us your photos! We’d love to see the finished products!
For more stability on the sea shell candles, I have glued a small plastic ring to the bottom of the sea shell. This keeps the shell from rolling around on the tray.